Tips for installing Word and Excel
A lot of Microsoft Office 365 plans include what’s called Desktop Licensing. This is the bit that lets you install the Microsoft Office applications such as Word and Excel on your computer. In this post we show you how to install Office 365 on your computer.
1. Sign in with your work or school account at https://portal.office.com/OLS/MySoftware.aspx.
Note: If you don’t see Office listed, your plan probably doesn’t include Office applications. If you know your plan includes Office, you may not have a license assigned. See What Office 365 product or license do I have? If Office is not listed, ask your Office 365 administrator to assign a license to you.
2. On the Office page, set-up which version of Office 2019 you want to install. By default, the 64-bit version is selected. You can change this by clicking on the drop-down box under Version.
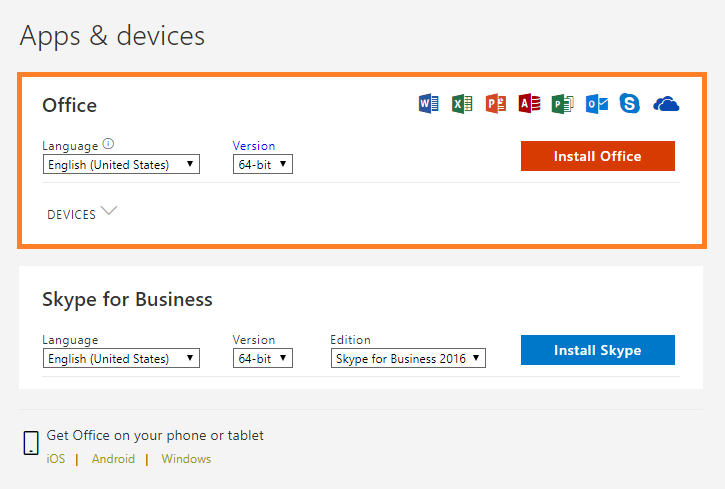
IMPORTANT: The process that installs Office 2019 also uninstalls all Office 2016 products. If you previously have the 32-bit version of Office installed, you should first uninstall this version before upgrading to the 64-bit version.
If you’re not sure which version you currently use, have a look at What version of Office am I using? or if you’d like to know which version you should install, read on Choose between the 64-bit or 32-bit version of Office.
3. Select a preferred Language from the drop down list under Language.
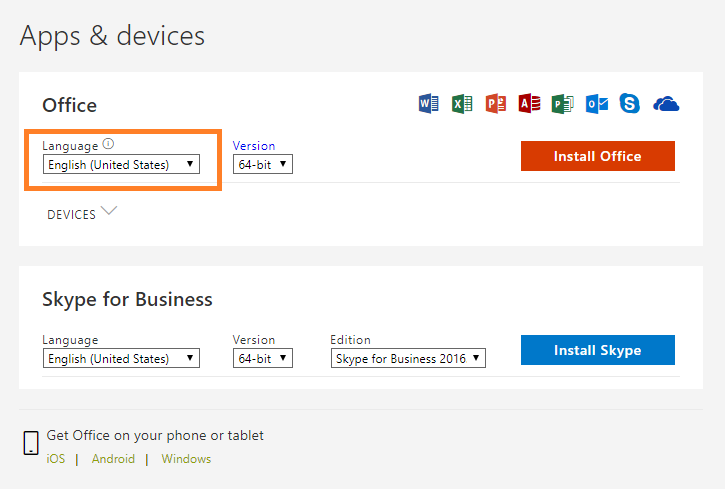
- Select Install.
- Depending on your browser, go to the install pop-up that appears then click:
- Run (in Internet Explorer)
- Setup (in Chrome) or;
- Save File (in Firefox)
NOTE: If you’re using Edge, first click Save, and then click Run.

If you see the User Account Control prompt that says, “Do you want to allow this app to make changes to your device?” Click Yes.
6. The install begins…

7. Your installation of Microsoft Office 365 is finished when you see the phrase, “You’re all set! Office is installed now”and an animation plays to show you where to find your Office applications on your computer. Follow the instructions in the window.
For example Click Start > All Appsto see where your apps are, and select Close.
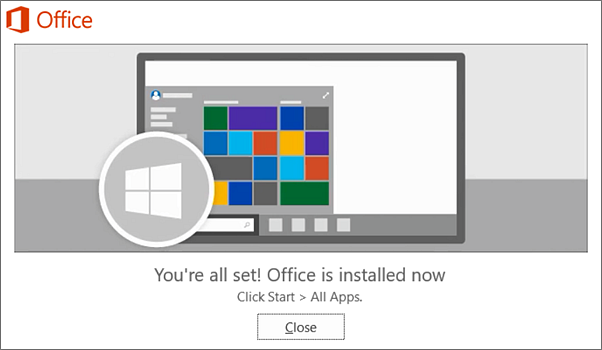
8. Start using an Office application right away by opening any app such as Word or Excel. In most cases, Office is activated once you start an application and after you agree to the License terms agreement by clicking Accept.
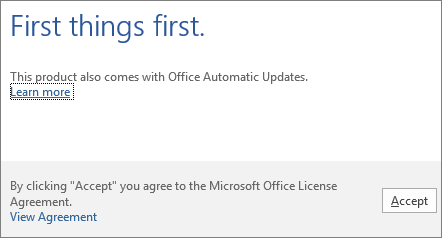
Now you’re ready to use Office 365!
A quick recap of the steps for installing Office 365
- Sign in with your work or school account.
- On the Office page, set-up which version of Office 2019 you want to install.
- Select a preferred Language.
- Select Install.
- Depending on your browser, go to the install pop-up that appears.
- The install begins…
- Your installation of Microsoft Office 365 is finished when you see the phrase, “You’re all set! Office is installed now”
- Start using an Office application right away by opening any app such as Word or Excel.
If you’re curious as to how other successful businesses utilise the Office 365 suite to the best of their advantage, you can head to one of our free webinars by clicking here or if you’re looking for new features and new ways to work your way around your freshly installed Office 365, click here.
Right when you need professional assistance in your Office 365 journey, we’d be glad to be there and help! Just reach out to us and let’s talk about how you can make the most out of your Office 365.
Are you ready to get solutions that drive positive change to your business? Reach out to us to know more about how we can build these solutions together.
